Do you want to make a web application in 30 minutes or less?
Do you want to quickly prototype Javascript development ideas? Then you should learn about JHipster.
What is JHipster?
JHipster is a development platform to quickly generate, develop and deploy modern web applications and microservices. You can use this tool to greatly speed up your development.
To run JHipster you first need to install Java (version 11 or higher), and Node.js (version 18 or higher). You can install JHipster with npm by running the following in the command prompt:
npm install -g generator-jhipster
Objectives for Web App Development Using JHipster
I am going to show how to quickly generate a web app with Angular front end and Java back end. JHipster will setup up security, logging, test framework, h2 in memory database as well as angular and Java code. The code will be written cleanly and you can easily modify it to suit your business needs.
How to Make a Web App with an Angular Front End
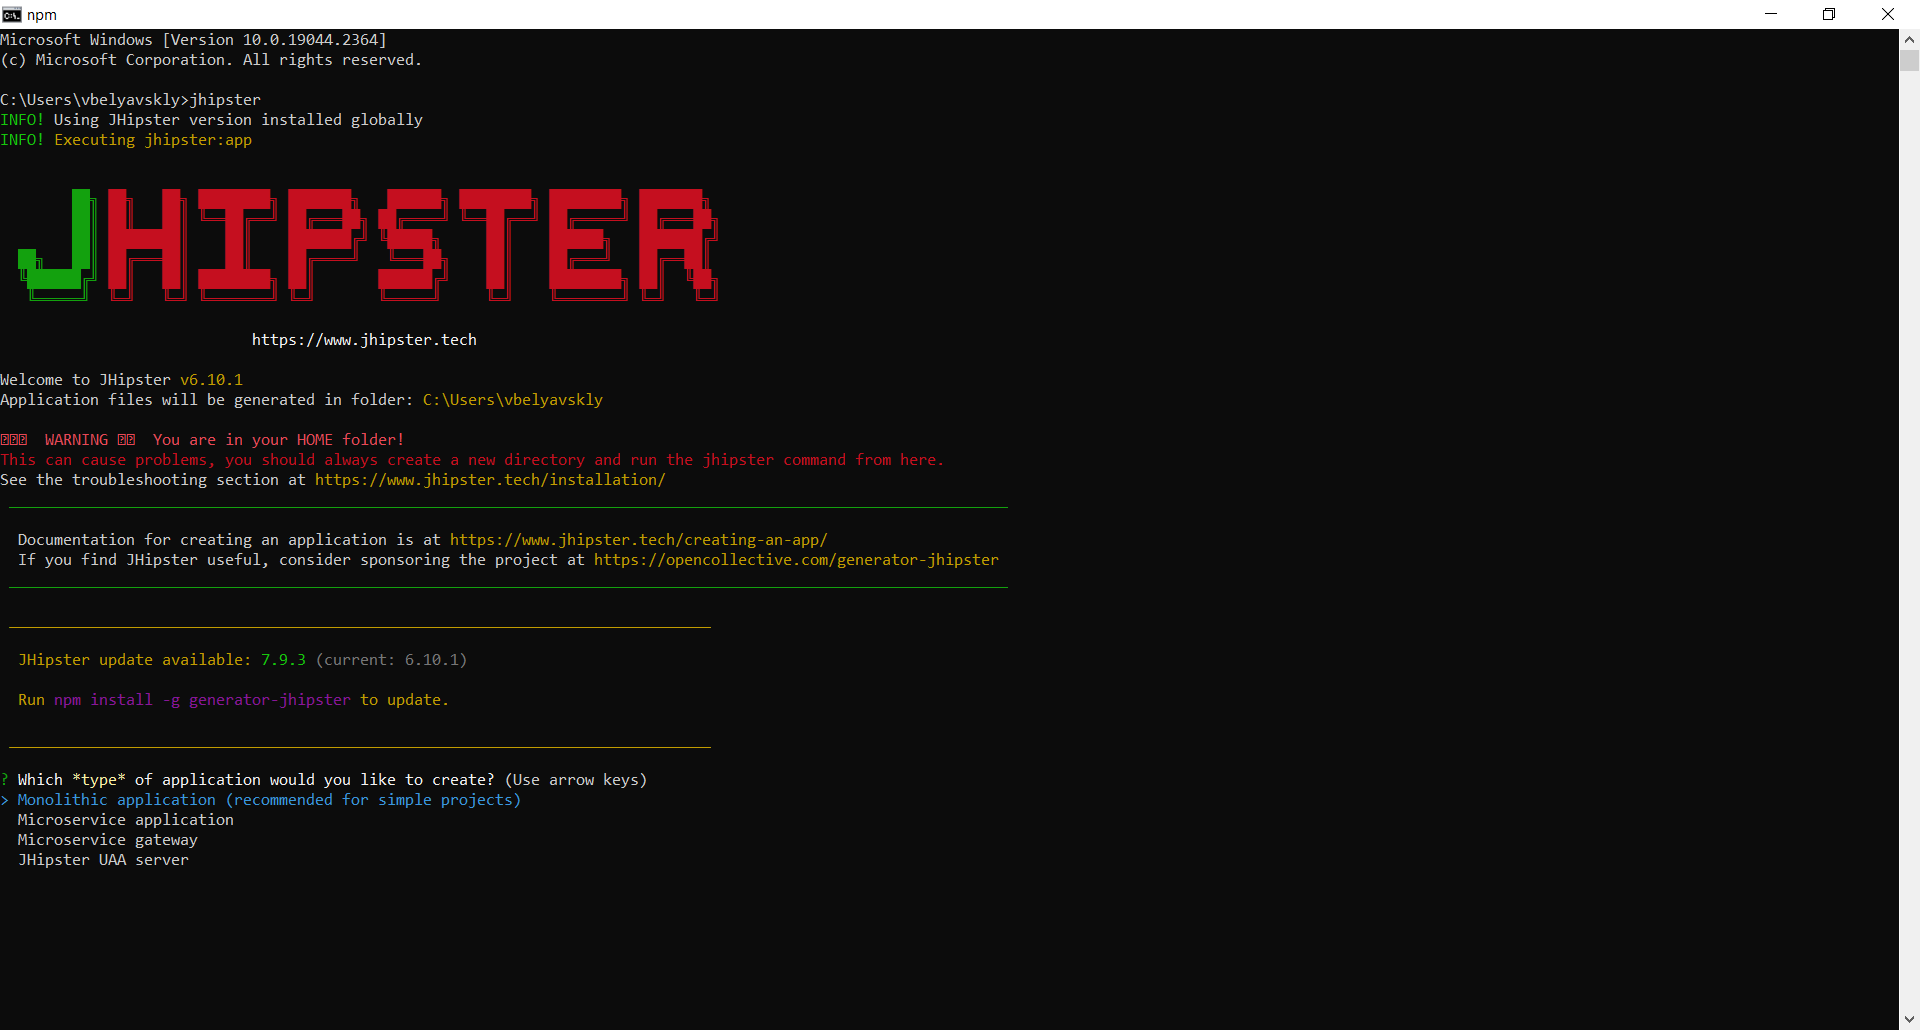
To get started, open the command prompt and create a directory for your demo project. This allows you to know where jhipster code will be generated. Then go into that directory and type jhipster. This will open a wizard that will ask you for the inputs for your program.
Shown below is the beginning of the JHipster program. Here it asks you what type of program you want to generate.
The JHipster wizard will ask you several questions regarding your program. I am not going to show you all screenshots to save space, but I have listed my choices below. The inputs laid out below will generate an Angular web app with a Java backend.
If you want more information regarding different options go to the jhipster.tech website.
The choices to create an angular web app are:
- Choose Monolithic application.
- Choose No to make app reactive with Spring WebFlux.
- Enter the base name of your app and package name.
- Choose No for JHipster registry
- Choose JWT for authentication
- Select SQL for database type
- Select PostgreSql for database production env
- Select H2 for development DB
- Choose Yes to use spring cache
- Choose No for 2nd level Hibernate cache
- Choose Maven to do builds
- Select Angular framework for front end
- Select Default JHipster for theme
- Choose No for internationalization
- Choose No for other generators to use.
You can choose different inputs to fit different business needs, but these are the inputs I chose. Once you chose all options hit enter and JHipster will generate an application for you. (See image below for reference)
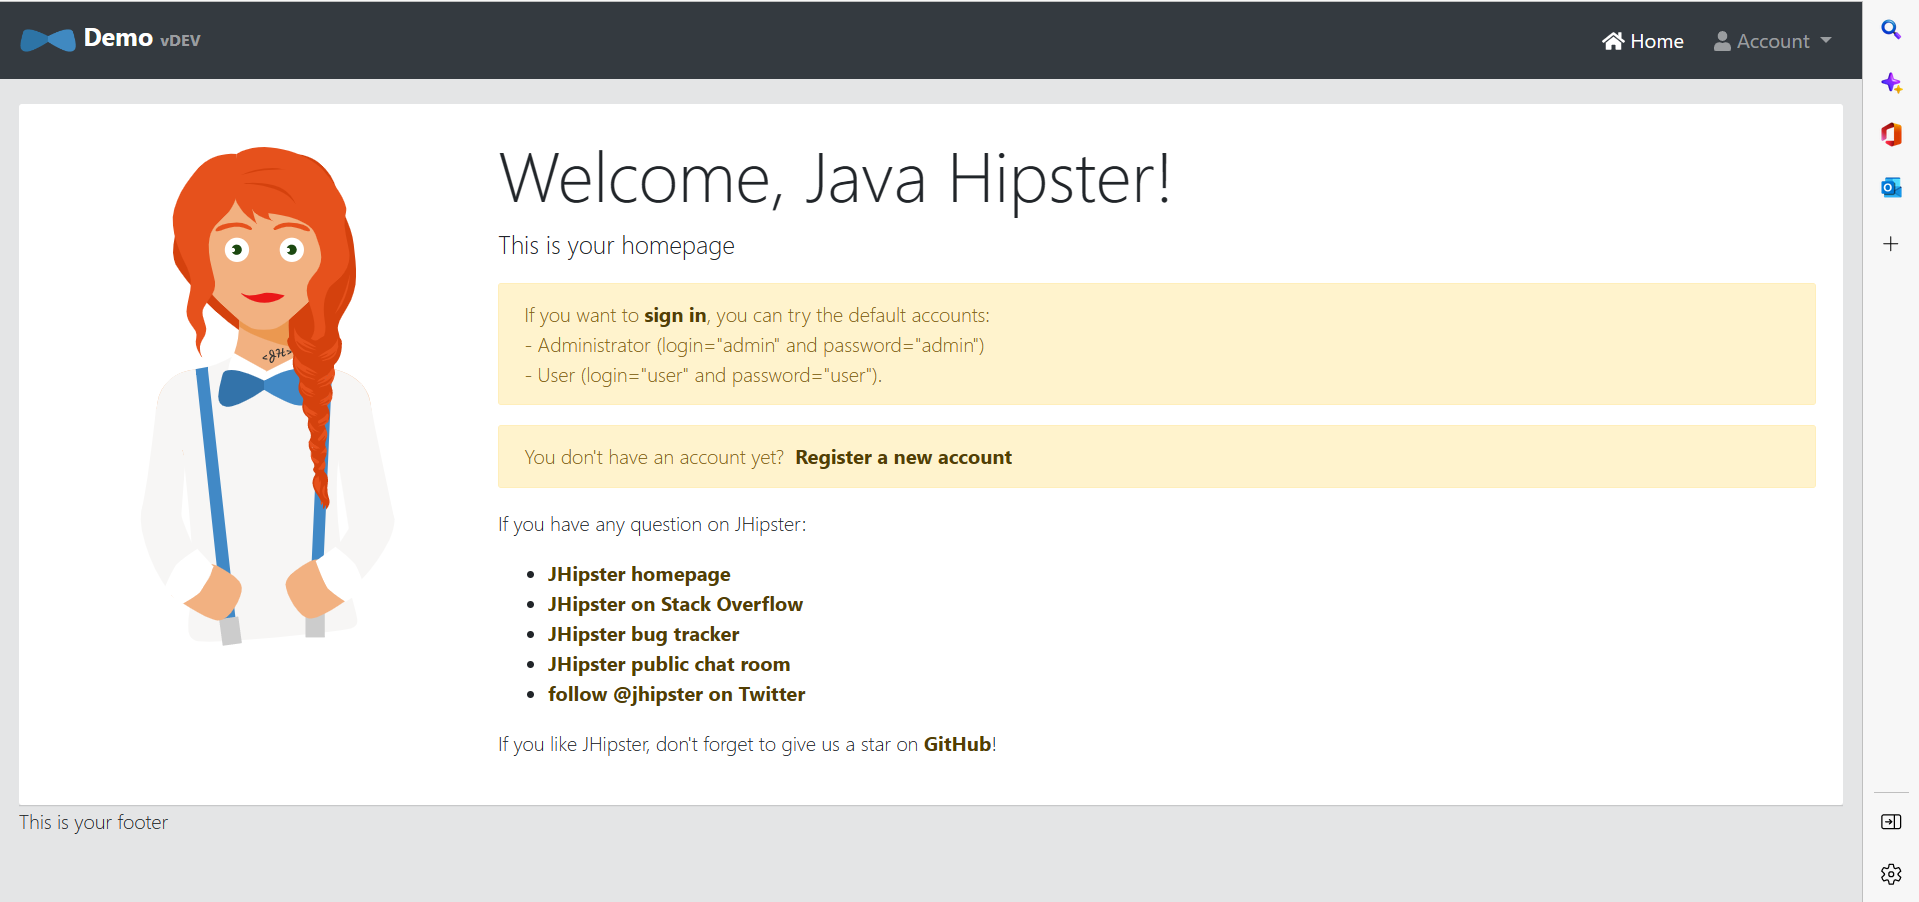
To start the application type: npm start on command line prompt. Npm (node package manager) will compile the application and open a browser window open with JHipster Graphical User Interface (GUI) (shown below). Congratulations, JHipster created a simple web app for you.
The default login for user access is username: user and password: user. For default admin accessusername: admin and password: admin. In your directory, you should see a src/main/java folder with all your java code. You should also see src/main/webapp with all your angular code.
In just several minutes JHipster will have set up security, logging, h2 database, rest controllers, repositories, and angular components for you. Without JHipster, developing a fully functional angular web app could take days, weeks, or months. JHipster allows you to save time and energy by automating the development process of developing a fully formed template for a web app. You can easily customize this application for your business needs.
If you’re interested in using this tool yourself, it’s free and can be found here:
JHipster – Full Stack Platform for the Modern Developer!
For boosting your business performance with automated processes and improvements in efficiency, our Web Application Development services can be customized to fit your needs. Contact us to learn more!


